Windows
A step-by-step guide for setting up TelemetryTV on Windows
Elevate your digital signage capabilities with TelemetryTV's Windows application, readily available for download on this document or on the Windows app store. This guide simplifies the setup of TelemetryTV on Windows 10 and 11 systems. For an optimal digital signage experience, consider deploying TelemetryTV on our specifically designed TelemetryTV Box OS.
System Requirements
Begin by ensuring your system meets the necessary prerequisites:
- Windows 10 or Windows 11 (latest patched build) with Microsoft Edge installed.
Please Note: Windows Home is not supported.
Compatible Devices
TelemetryTV can operate on a range of devices including Intel NUC, Mini PC, Video Wall Intel NUC, and many more. For a full list of all recommended devices, visit our hardware page.
Advantages and Disadvantages of Using Windows Digital Signage Players
Before proceeding with setup, consider the following:
Advantages
- Setup process is straightforward
- Wide availability and customization options
- Ideal choice for setting up video walls.
Disadvantages
- Might not be the best choice for large-scale deployments
- Can incur higher costs
- Vast amount of configuration settings that may case issues with TelemetryTV
Downloading TelemetryTV via the Media Player AppInstaller
There is an MSI package of the Media Player AppInstaller for Windows and is downloaded below.
Once your system is ready, download the latest version of our Windows Media Player here:
Confirm that your Windows installation can use Appinstaller files.The Appinstaller file checks for updates each time the app is run, and installs the app if an update is found. Please ensure that your Windows installation can use Appinstaller files. Restrictions or blocks on Appinstallers are not supported.
Downloading TelemetryTV via the Windows App Store
TelemetryTV also has a Windows 10 App available on the Windows app store. This application allows you to turn any compatible Windows computer in to a digital signage player.
Setting Up TelemetryTV on Windows
There are multiple ways to configure applications on Windows. Advanced users can follow the guide from Microsoft on setting up a single app kiosk. Please note that we cannot provide support for this method, and you are responsible for updating the app as changes occur.
Follow these steps to setup TelemetryTV on your Windows device:
-
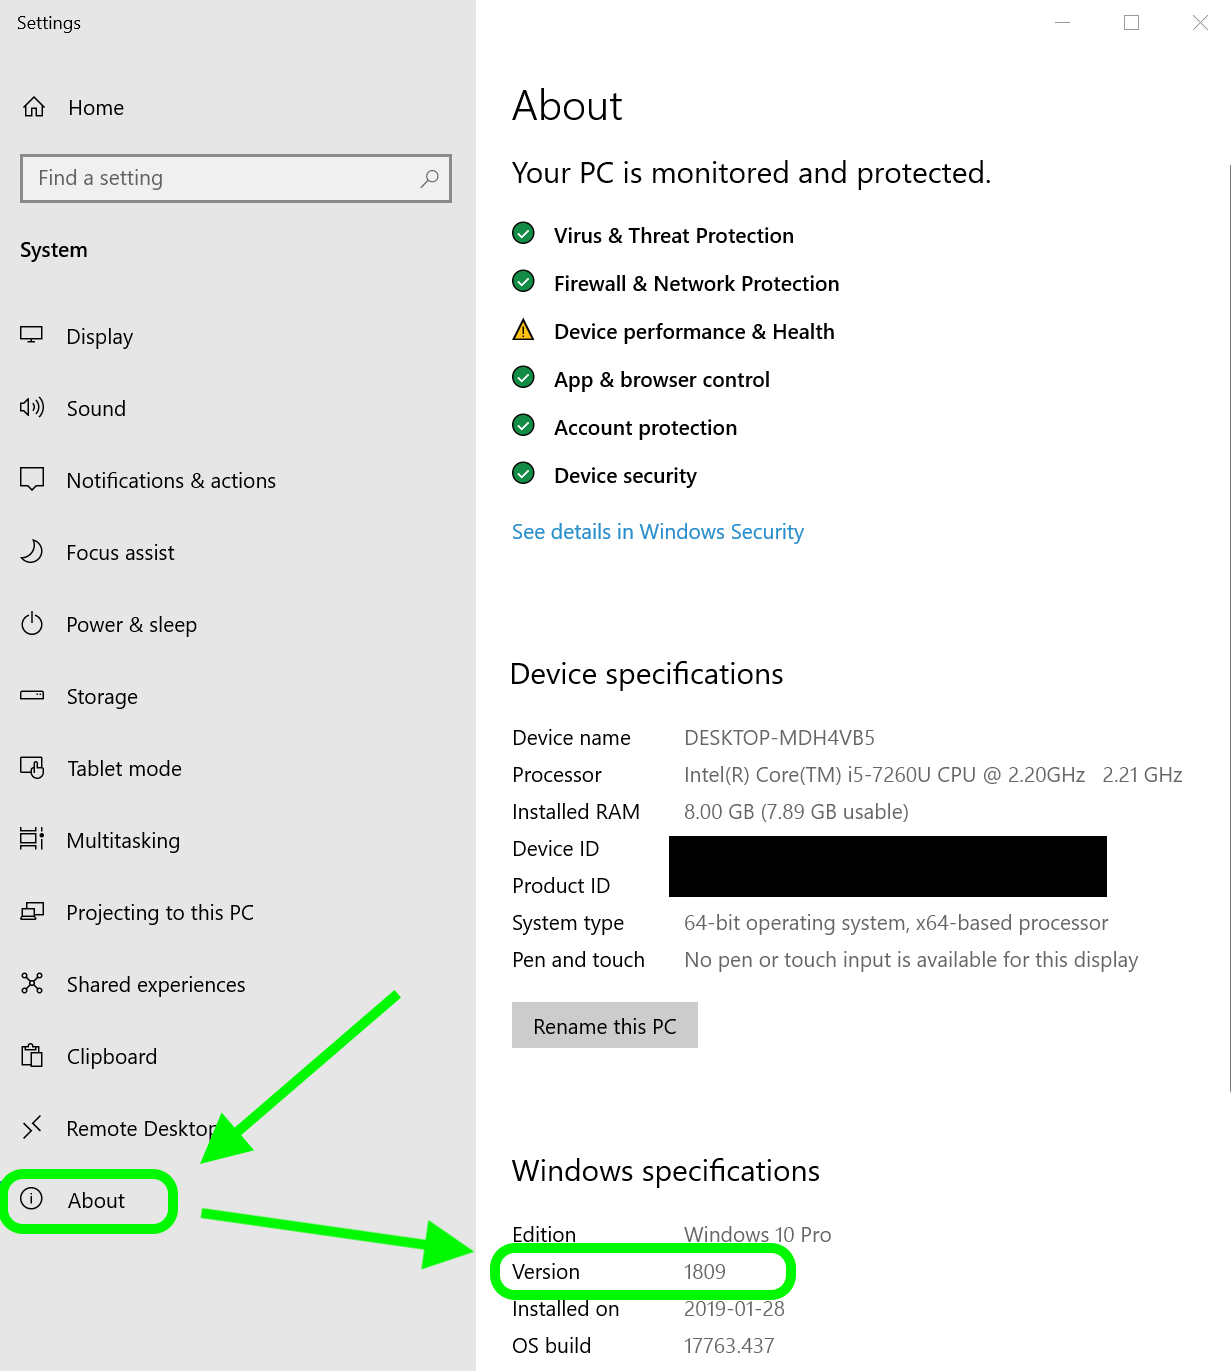
You need the Fall 2018 release of Windows 10 or later to use TelemetryTV (build version 1809).Ensure the Latest Windows 10
To check your version: Check your version at Start > Settings > System > About, under "Windows specifications".
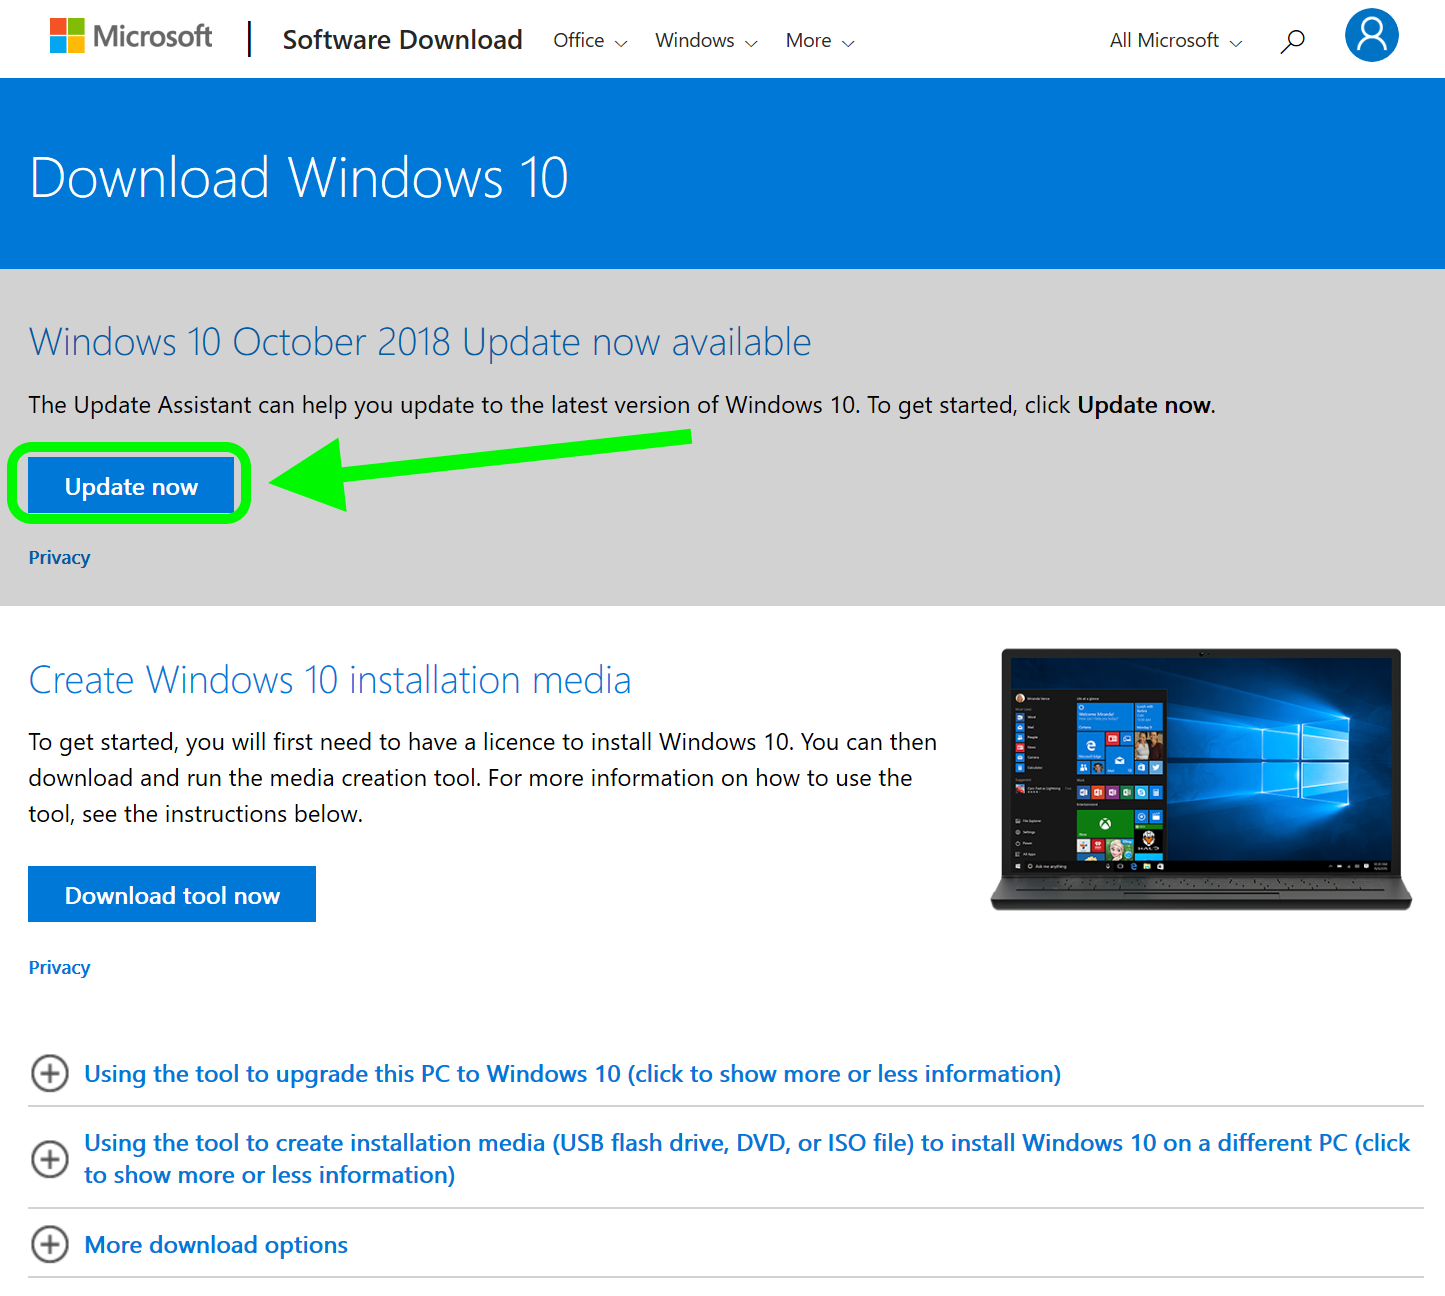
If you're out of date, we've found that the best way to get to the Fall 2018 release of Windows 10 is to download and run the Windows Update Assistant.
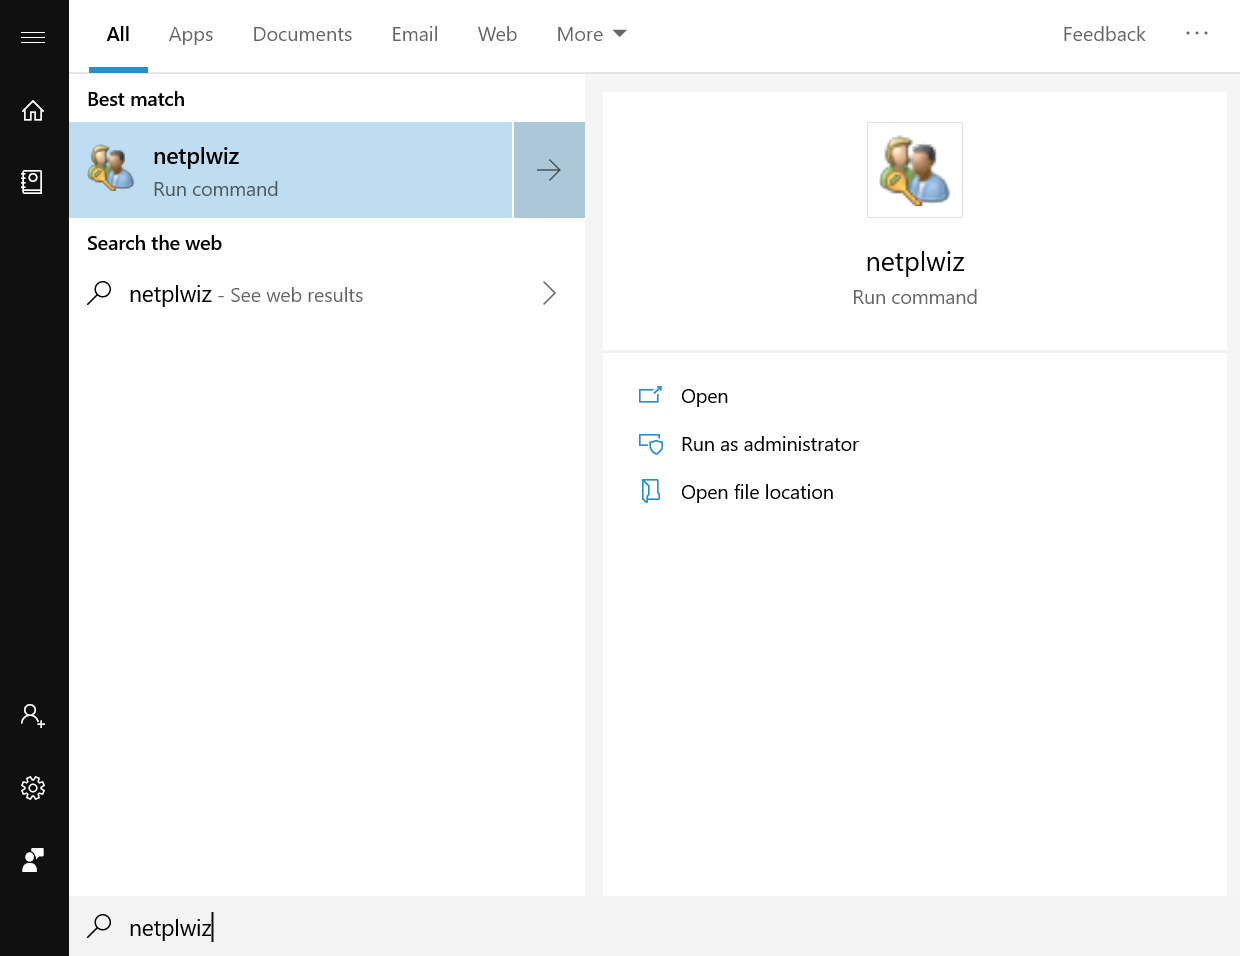
Although not required, recommend creating a non-admin user account and turning on auto-login for a seamless Telemetry boot after a restart. Set Windows to automatically log in to an account and configure the TelemetryTV In the start menu, by searching for 'netplwiz' and run the command
Select "Add"
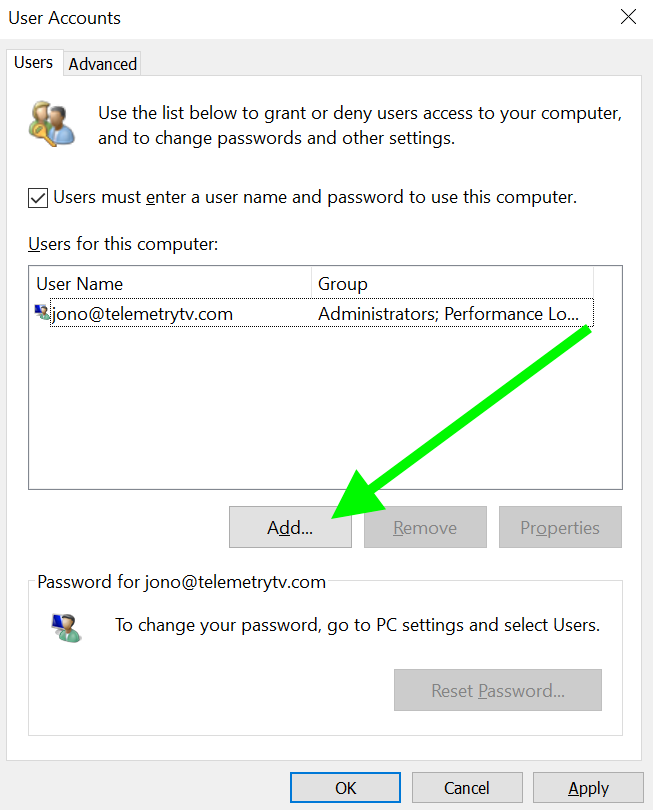
- Select "Sign in without a Microsoft account"
- Choose "Local account"
- Enter a name for the new account.
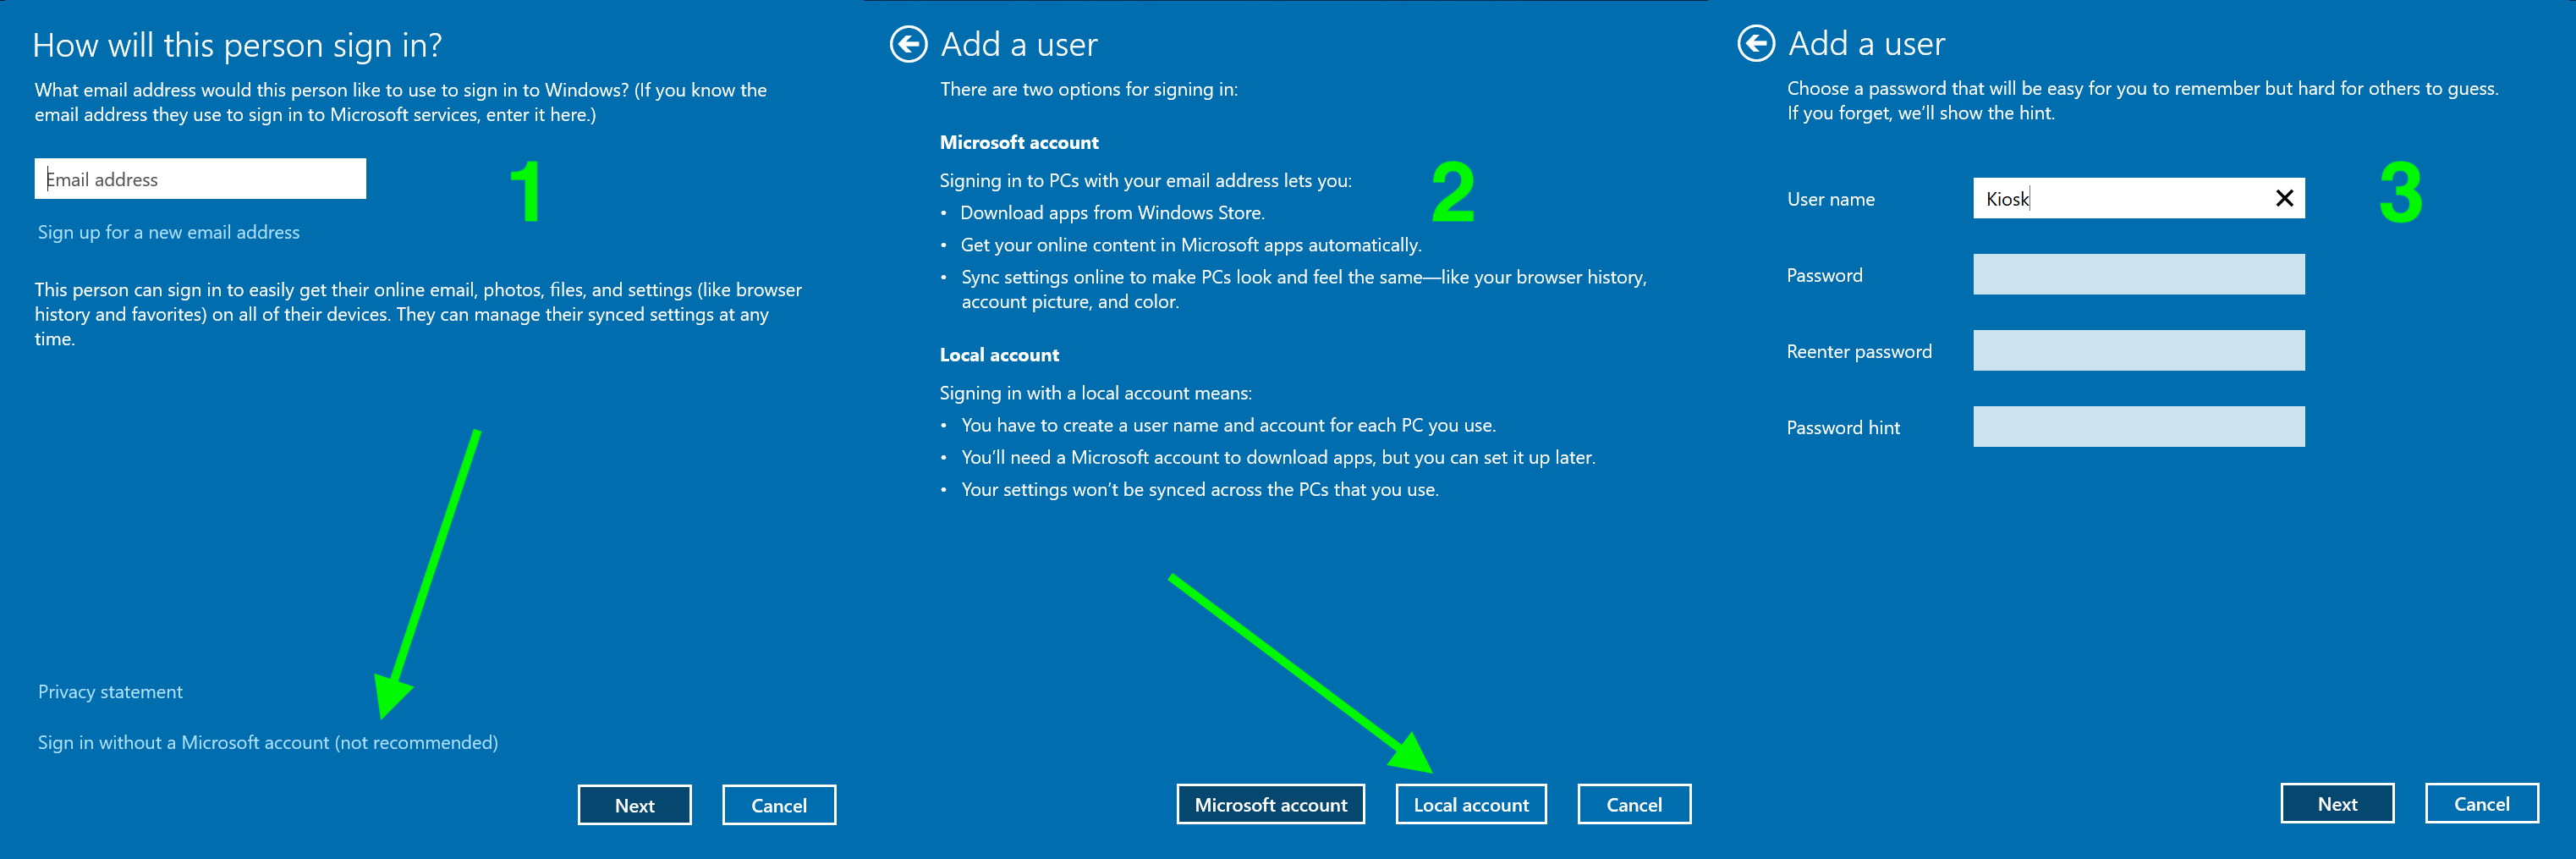
- Hit finish, then set we'll enable auto-login.
- Uncheck the check box that says "Users must enter a user name and password to use this computer", then hit ok.
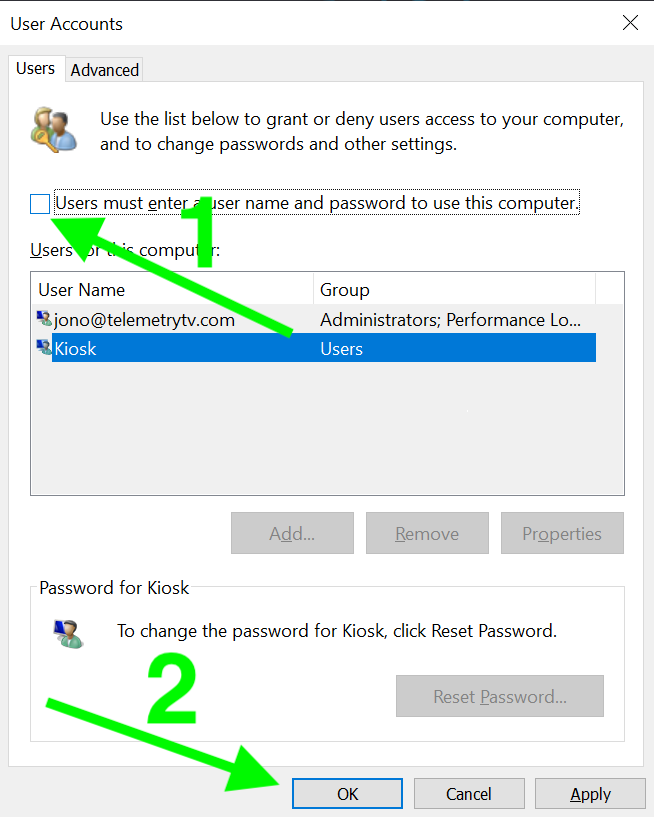
- Enter the information for your newly created account, then hit ok.
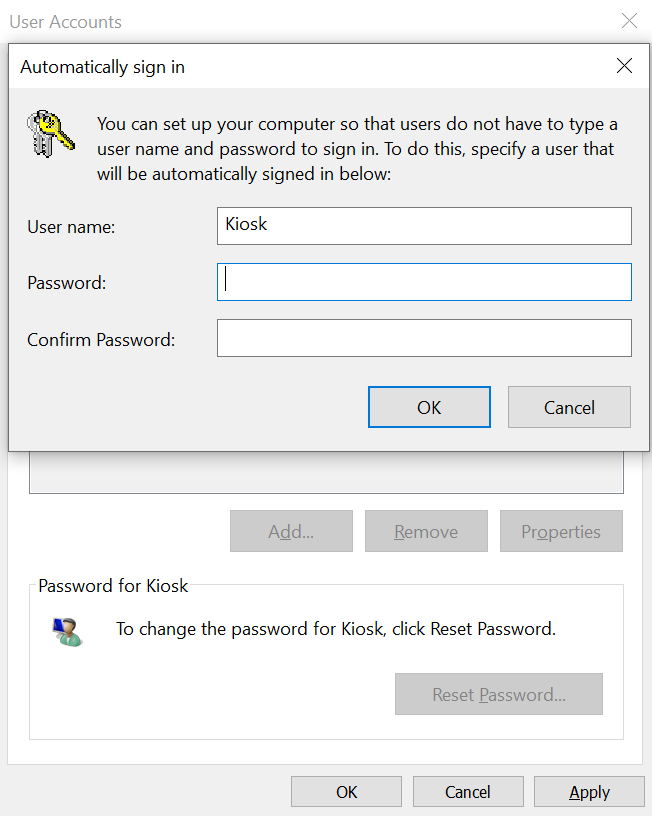
- This new user will now automatically login every time Windows boots up!
Log in as your newly created user and download the TelemetryTV app using the steps outlined under "Downloading TelemetryTV via the Media Player AppInstaller" or "Downloading TelemetryTV via the Windows App Store"
Optionally,~~ provision your device ~~to automatically with a provisioning token from your TelemetryTV account. This is recommended for deploying devices at scale.
To automatically provision your device with a provisioning token, use the following:
To provision with just the token:
"location of the player application" --provisionToken=token
For example:
"C:\Program Files\WindowsApps\TelemetryTVPlayer_23.10.2.0_x64__ryz737bay5ffj\VFS\Local AppData\electron_player_app\app-23.10.2\TelemetryTVPlayer.exe" --provisionToken=7057f7be802e6c68c959e349eca30295
To provision with the provision file:
"location of the player application" --provisionFile="location of the provision file"
For example:
"C:\Program Files\WindowsApps\TelemetryTV.TelemetryTVPlayer_23.5.1.0_x64__cwa51g4fre0de\app\TelemetryTVPlayer.exe" --provisioningFile="C:\Users\Sunny Chowdhury\Downloads\telemetry_provisioning_Default.json"
After running the TelemetryTV media player, a pairing code will appear. In the TelemetryTV web app, navigate to the "Devices" page, click "Pair", and enter the pairing code.
Managing Updates in Windows 10
We recommend not pausing updates for long periods to ensure you receive important updates. If updates might disrupt your digital signage viewing experience, consider pausing updates for a reasonable time (e.g., a month), and setting updates to occur after hours to minimize disruption.
Video Walls
To deploy a video wall on Windows 10/11 with TelemetryTV, you'll need hardware and drivers that support combining all the displays into a single display. We recommend AMD's Eyefinity and Intel's Collage drivers, both of which have been tested with TelemetryTV.
Read Intel's instructions on enabling Collage Display for video walls.
More on~~ video walls here.~~
App UpdatesRemember, to ensure smooth and continuous operation, it is essential to keep the app updated. Outdated versions may encounter performance issues.
Updated 2 months ago