Playlists
Create and organize your playlists.
Organize your content into playlists to start sharing with your audience!
TelemetryTV's Playlist feature is an easy, one-stop shop for content creation and management. Using the powerful and intuitive Playlist Editor, you'll be creating and organizing beautiful Playlist Pages in no time. This article will help you learn the basics of the Playlist Editor, and teaches you how to do all of your page creation and management without ever leaving the Playlist module.
In this article, you will learn how to:
- Create playlists
- Organize playlists using folders
- Manage playlist options
- Create content within a playlist using the Playlist Editor
- Preview playlists
- Share content between playlists
The Playlists icon:

Your Default Playlist
When your account is created you'll have a default playlist ready to add content to. Creating pages in the default playlist is the fastest and easiest way to begin creating content.
Creating a New Playlist
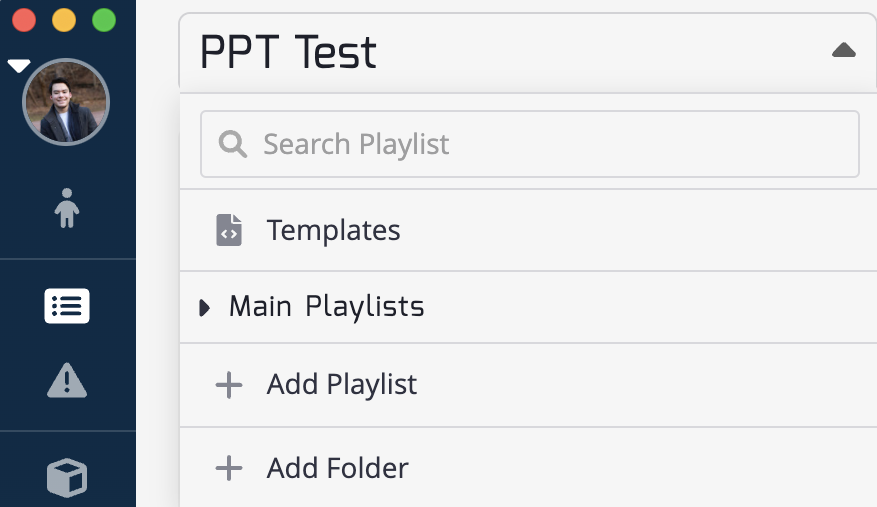
You can create more playlists if you navigate to the playlist page by clicking the playlist icon in the left toolbar. Click the drop-down menu in the top-right, and select Add Playlist.
Give your playlist a name. Now, you're ready to start adding pages to it.
Playlist Folders
To create a new playlist folder, select Add Folder from the drop-down menu. Give your folder a name. You can create nested folders within other folders. We recommend grouping playlists by type or location so that they're easy to find.
Pro tip: On our Standard Plan, you can give your user groups permission to access certain folders, while hiding others. This can be done when creating the folder, or by clicking the "⋮" beside the folder in the drop-down menu.
Playlist Options
Once you create a playlist, you can access the playlist options by clicking the "⋮" beside the playlist name in the dropdown menu. From the drop-down menu, you can rename the playlist, set the playlist as the default playlist (heart icon), move the playlist to a different playlist folder (folder icon), duplicate the playlist (copy page icon), and delete the playlist (trash icon).
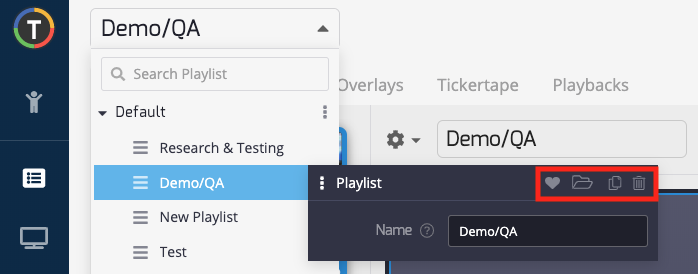
When you go to duplicate a playlist you have 2 options:
-
Toggle off (default) for Copy Shared Contents- Uses or clones existing shared content. Edits affect all other playlists.
-
Toggle on (as shown below) for Copy Shared Contents- This creates a new copy of all shared content in this playlist, so that future edits will not affect other playlists containing the same contents.
Playlist Editor
The Playlist Editor allows you to create content directly within the playlist module, from the content menu to the right side of the page (highlighted in red). All App, Media, and Canva content are now in one simple place, and can be added to playlist page from the same user window.
☝️Learn about Apps, Media, and Canva to become a content creation expert.
Populating your Playlist
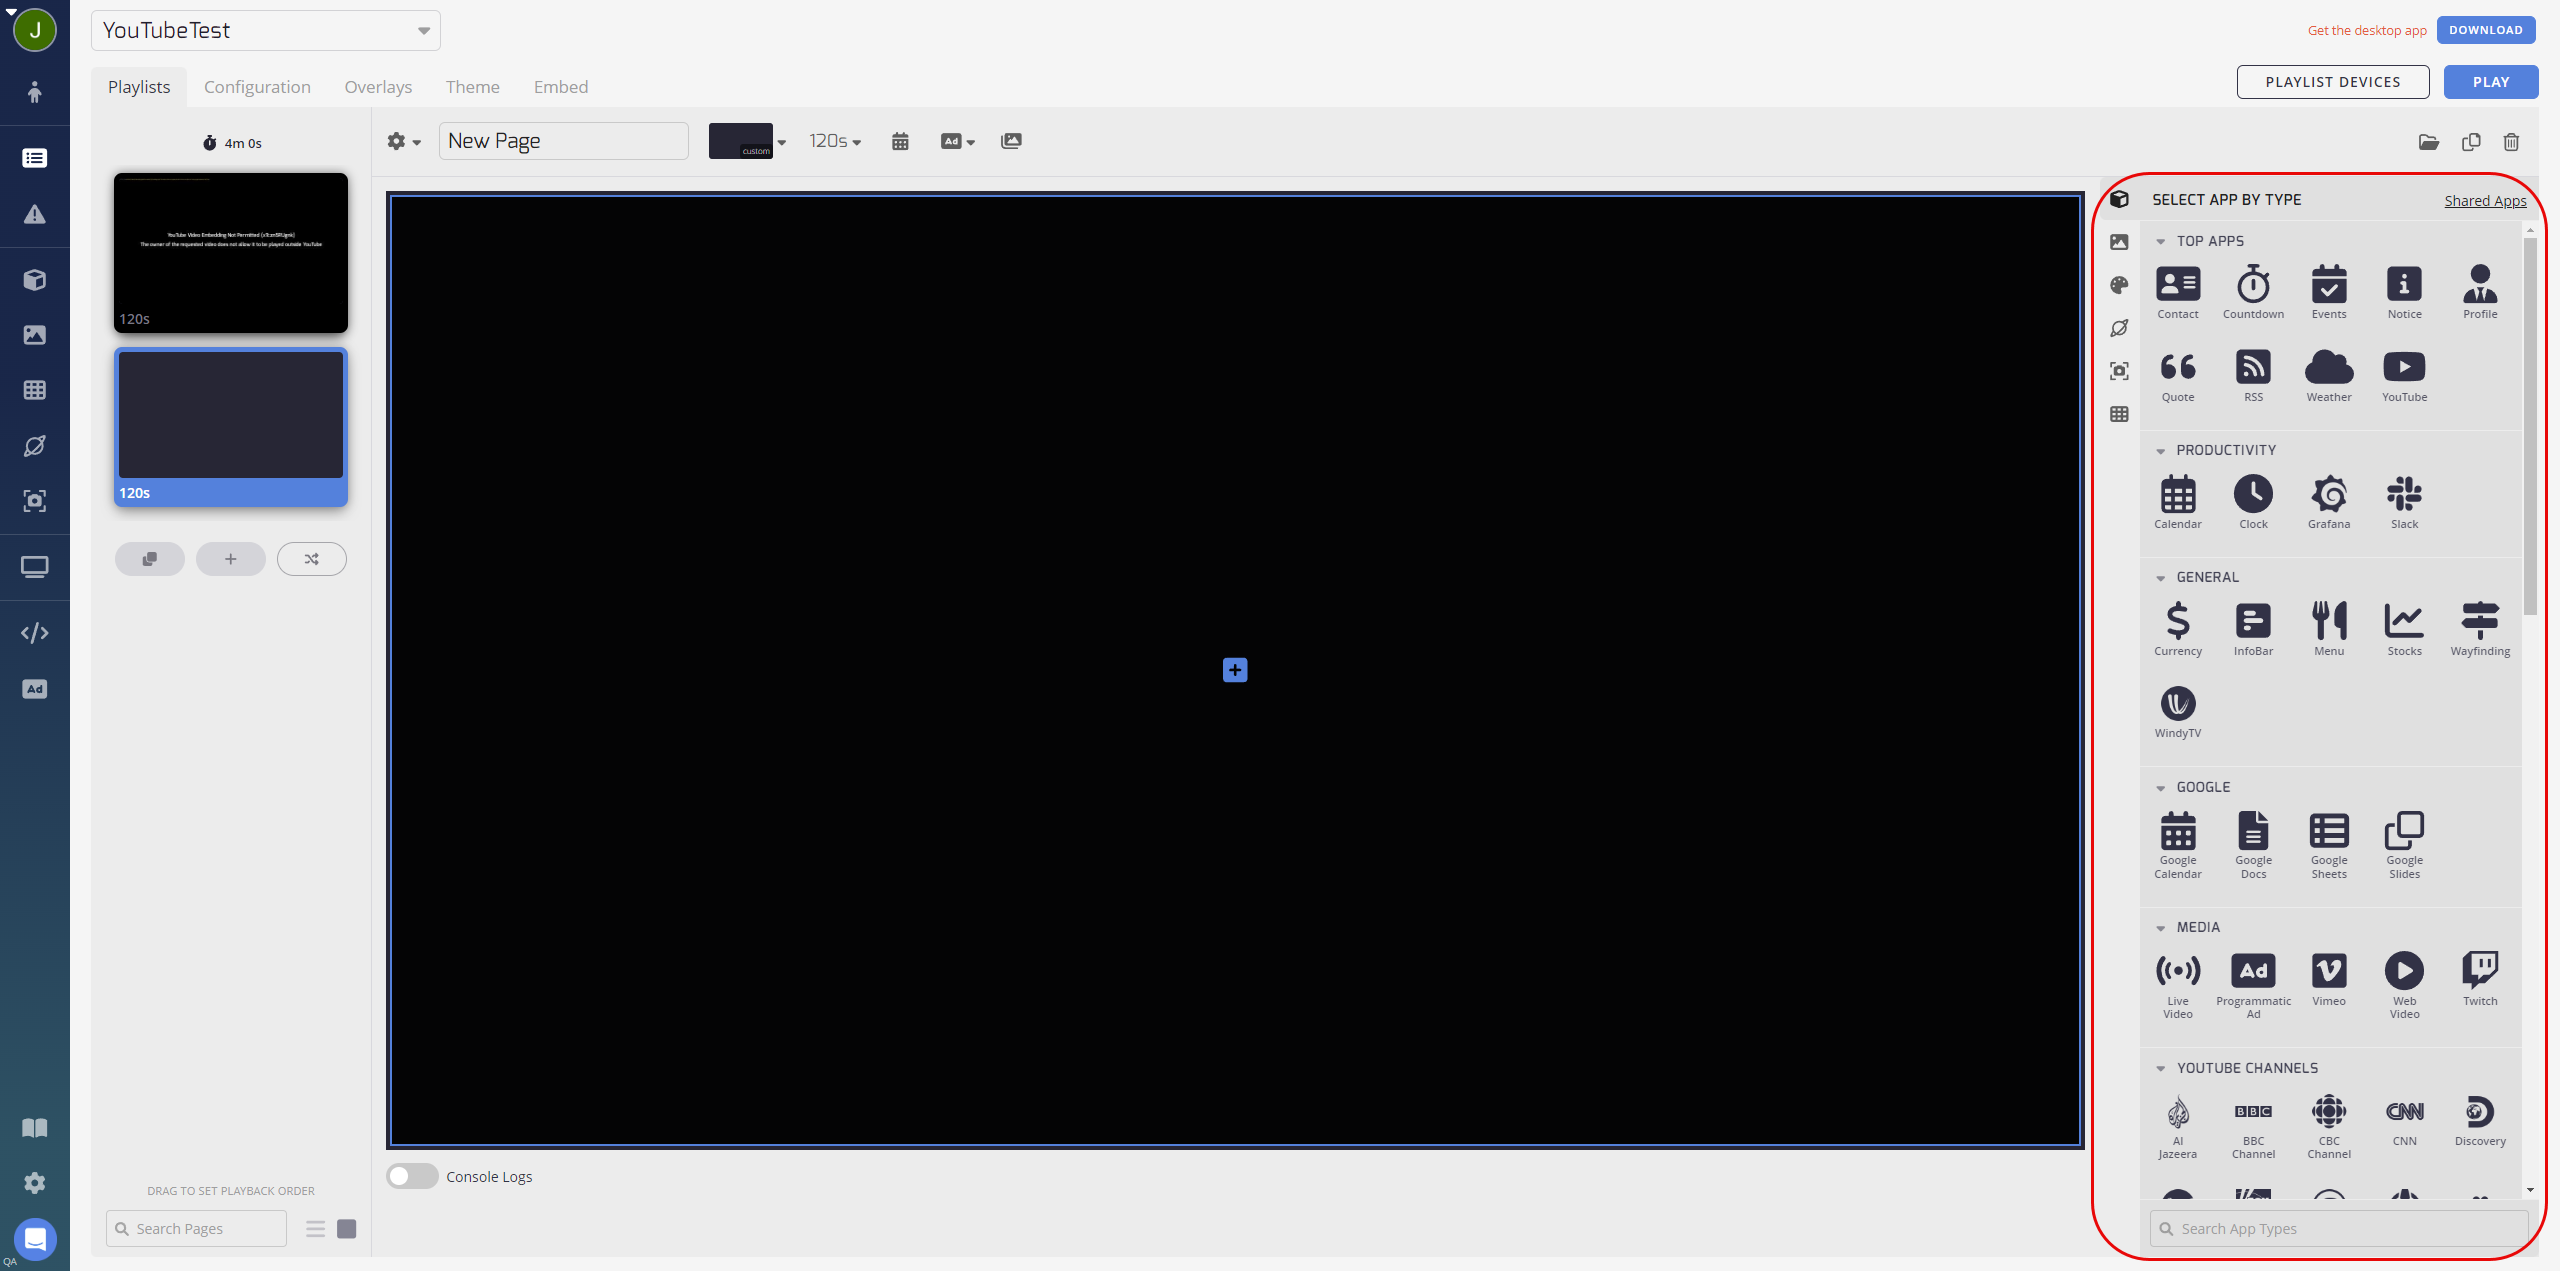
- To add content to your playlist, click Add Page. You are now looking at a preview of your new page.
- To select what type of content you would like to add, hover over the preview and click the + button.
- Select new content from the tabs on the right side, and can either create brand new content or select from your existing Shared content.
- Once selected, you'll see your a preview of your page, with your selected content, displayed on the screen.
You can also create a page using a Template,
To create a page with multiple pieces of content, check out Playlist Zones.
Playlist Play Order
Playlists play in order of sequence from top to bottom. To change the play order of your pages, just drag them!
Playlist Preview
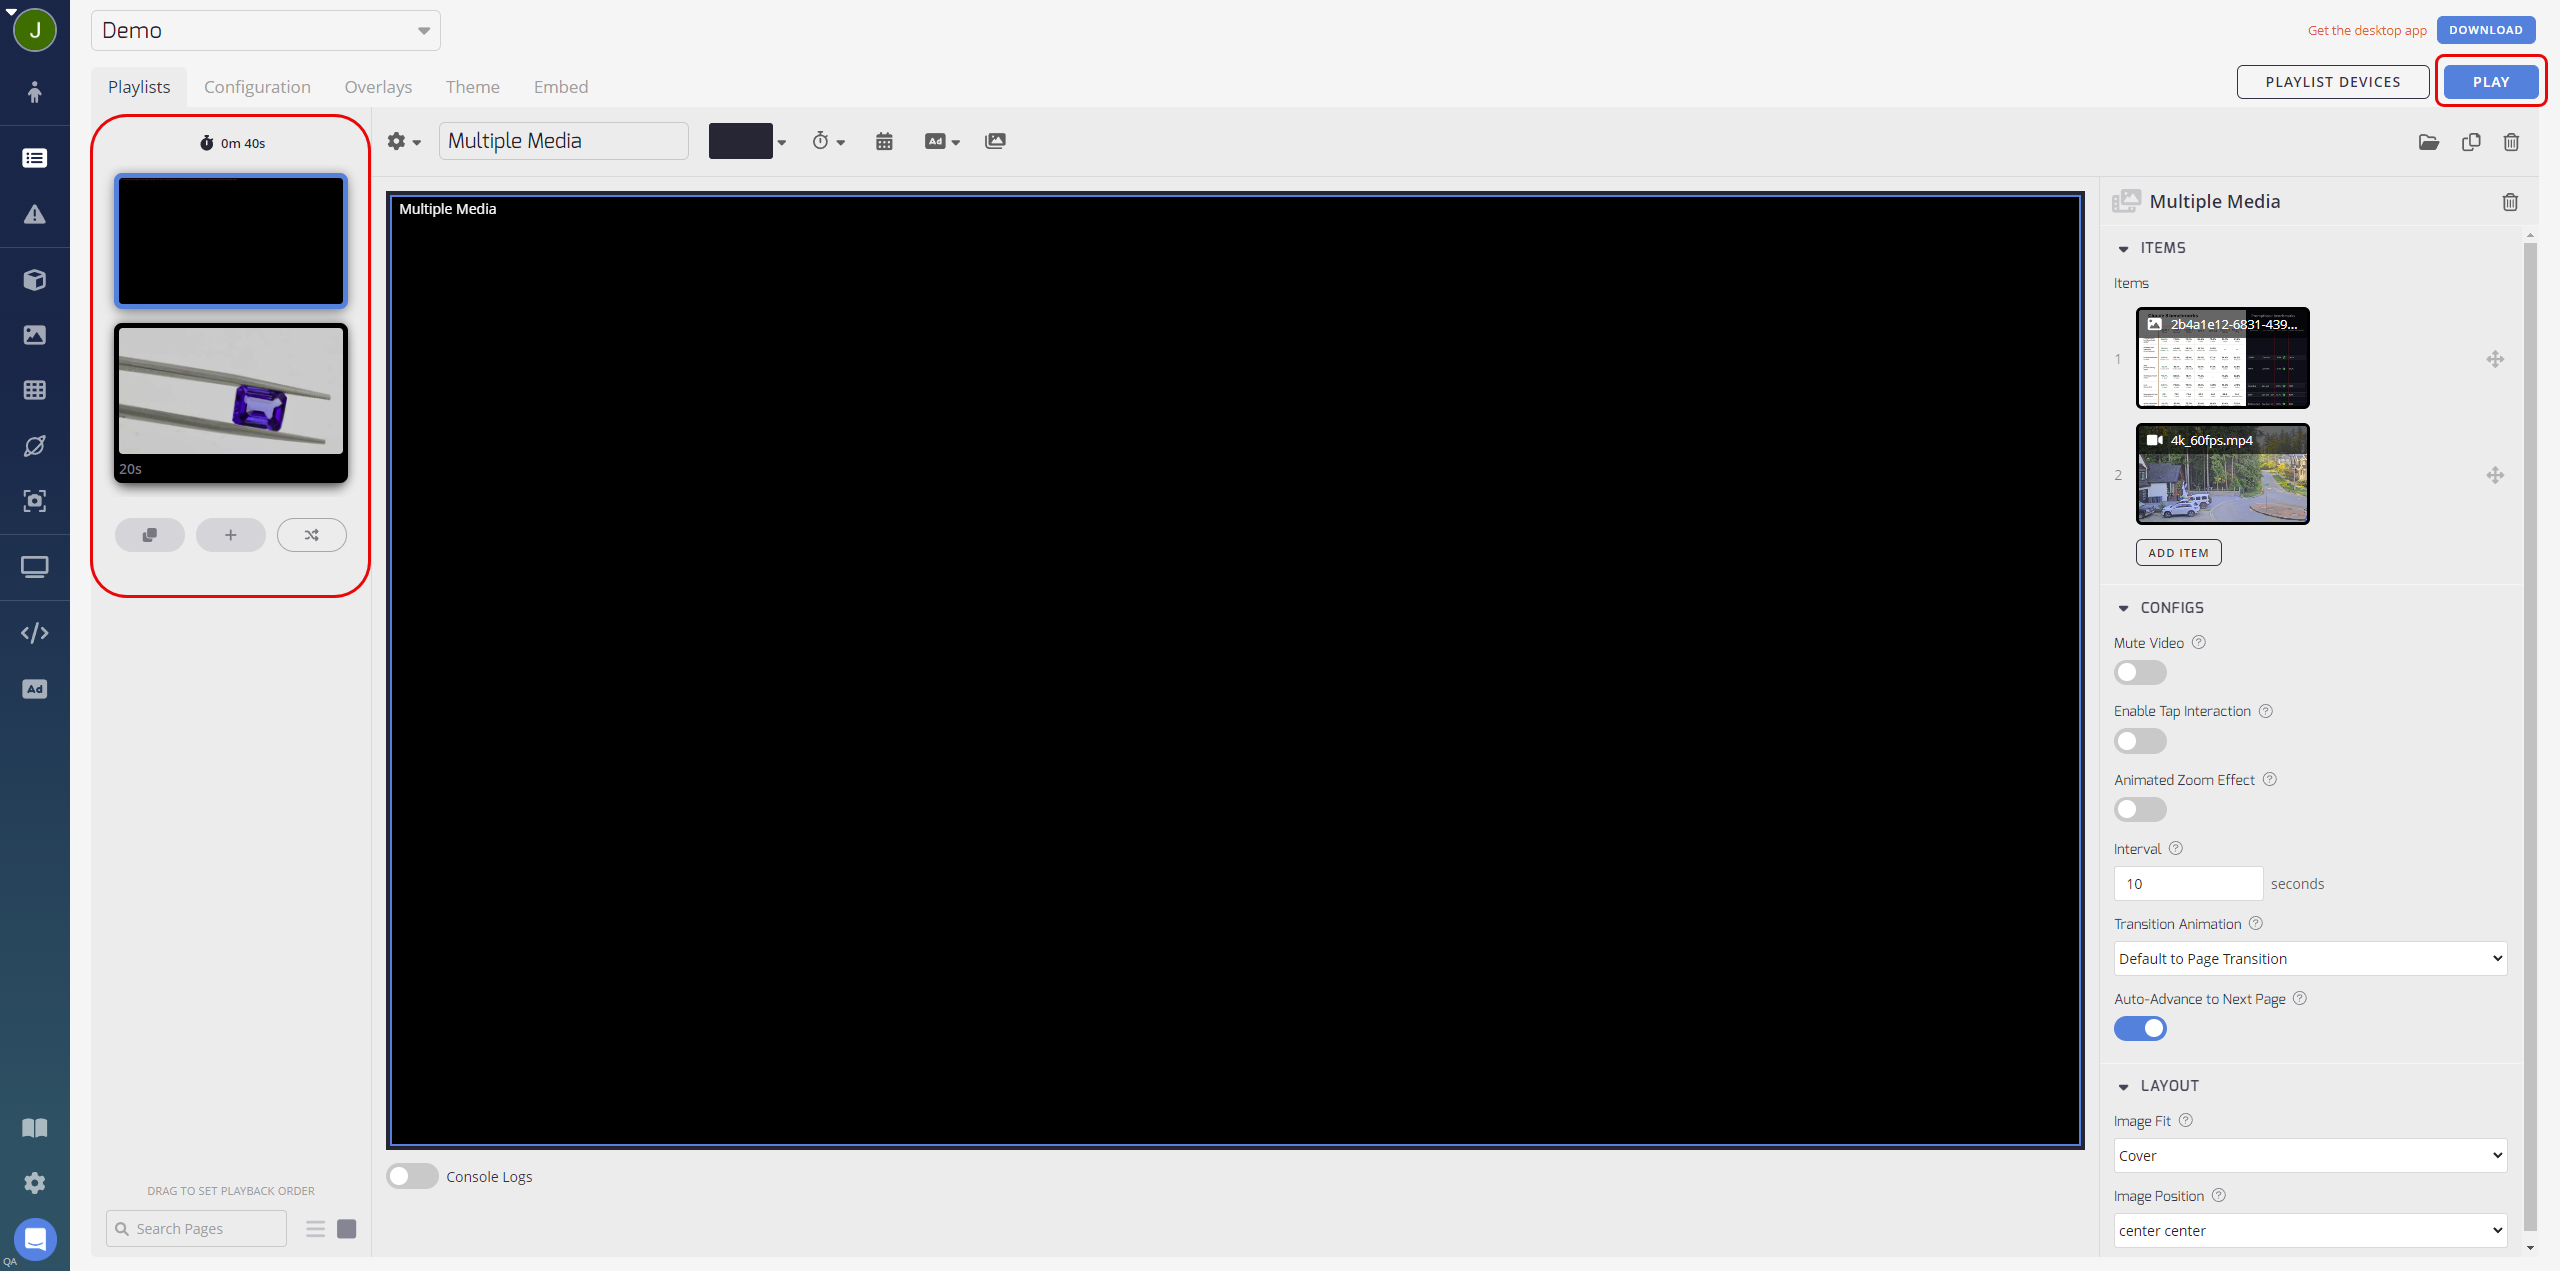
To preview your playlist, select the page from which you'd like to begin, and press the Play button on the top right of the page preview. Your playlist becomes full screen and plays through.
☝️ Please note: The in-app play option is only intended for preview purposes, so you will encounter an End of Playlist message when it is done. Your playlist only loops when displayed on a device.
Our system takes a live screenshot of your playlist pages, making it simpler to organize and visualize your signage. That means that each of the playlist page thumbnails (highlighted in red) are real-time representations of the actual content of the page itself, and updates dynamically as updates are made to the corresponding page.
Page Options
When you have a page selected, you'll see a toolbar above the preview with several options:

- The Settings drop-down menu has several options to customize your page.
- You can rename your page in the text field.
- The next drop-down menu allows you to create Playlist Zones.
- The Duration drop-down menu allows you to set a fixed duration for your page to play.
- The Calendar icon drop-down menu lets you schedule your playlist page for a specific time. Read our article on scheduling to learn more!
- The Ad Campaign drop-down menu enables you to select an ad to include.
- The Page Background icon lets you select a page background for the page, overriding any background settings on the individual content and making the page look more uniform.
- On the right hand side, you have the option to Move the page to a different playlist, Copy the page to a different playlist, or Delete the page.
💡 Pro tip: A fixed duration does not need to be selected for videos. If you toggle off this option for videos, your playlist switches to the next page when the video is finished. If you set a fixed duration different than the video run time, it is either cut short or loops back to the beginning.
Sharing Content Between Playlists
Telemetry TV allows you to store shared files (or apps) in the media repository for easy access. You can also directly import files from OneDrive or your local device.
When you create content like an App, Media, or Board, you have the option to Share this content, or leave it as Non-Shared. We created this new categorization to help you avoid a huge, messy library of content. A lot of content is used once, then deleted from a playlist page never to be used again.
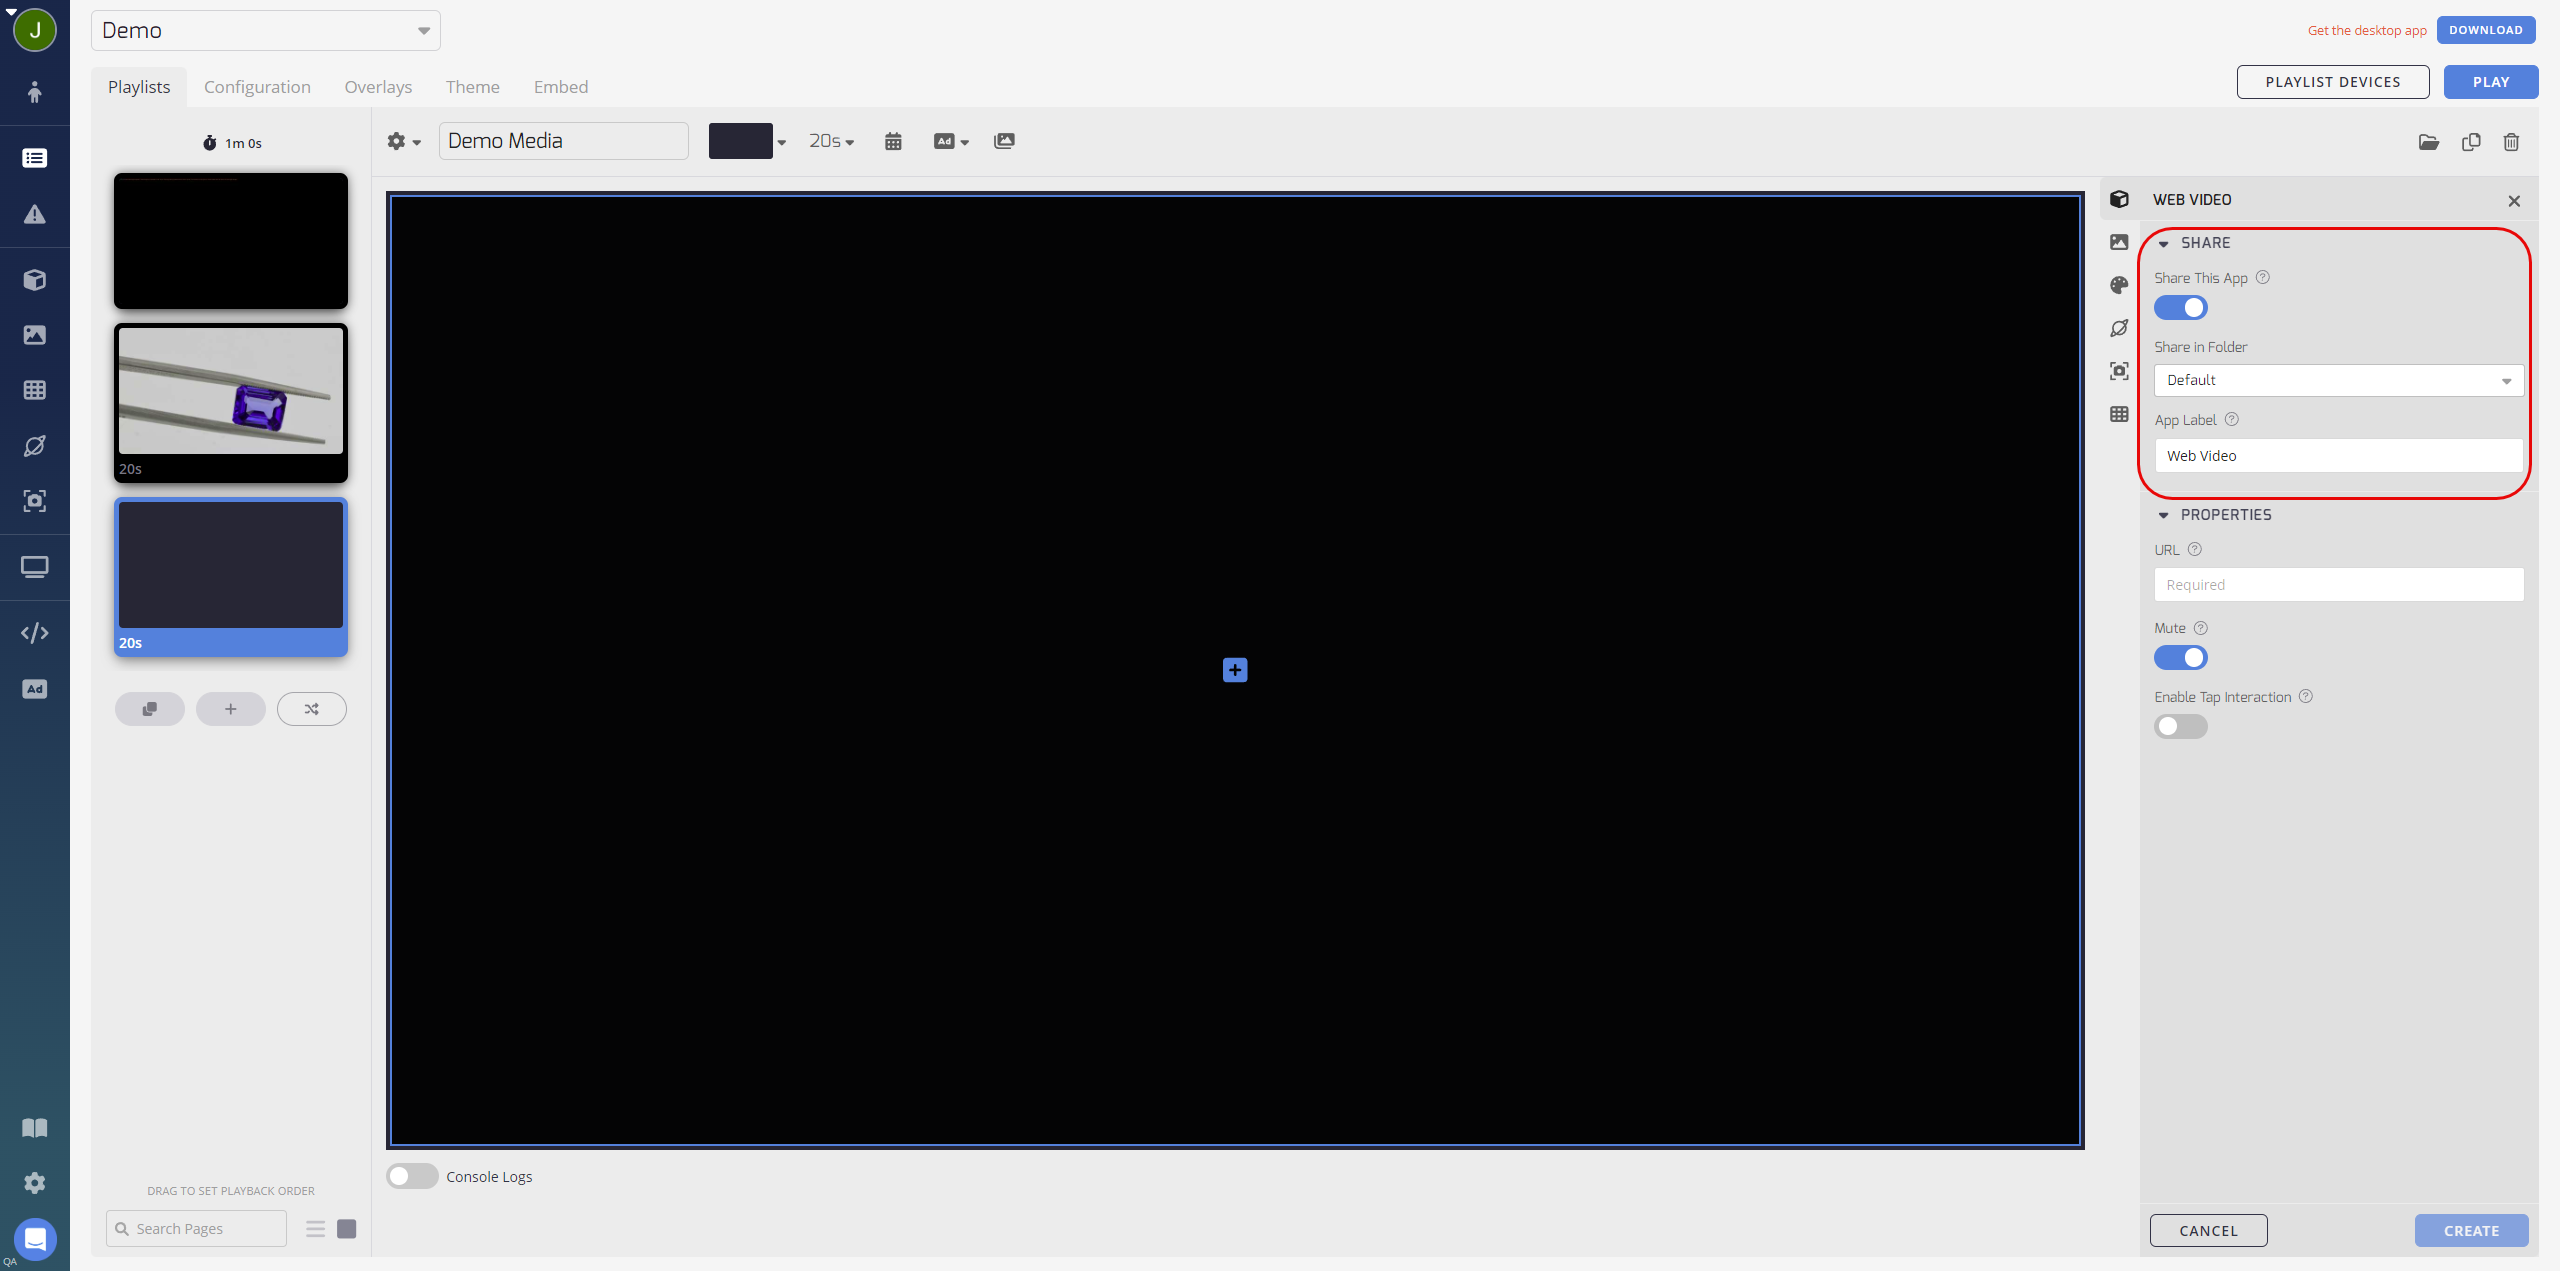
When content is Shared, you may add it to a folder using the Share in Folder drop-down menu and it will be available for use across multiple playlists. Make sure to mark your content as Shared if you want others to be able to access and use it and to fill in App Label. Please note that any changes made to shared content are applied to that content on all playlists in which it resides!
When content is Non-Shared, it exists only on that playlist page. Once it is deleted, it is removed from the account. We recommend leaving content as Non-Shared when it is for one-time use, or for use on a single page.
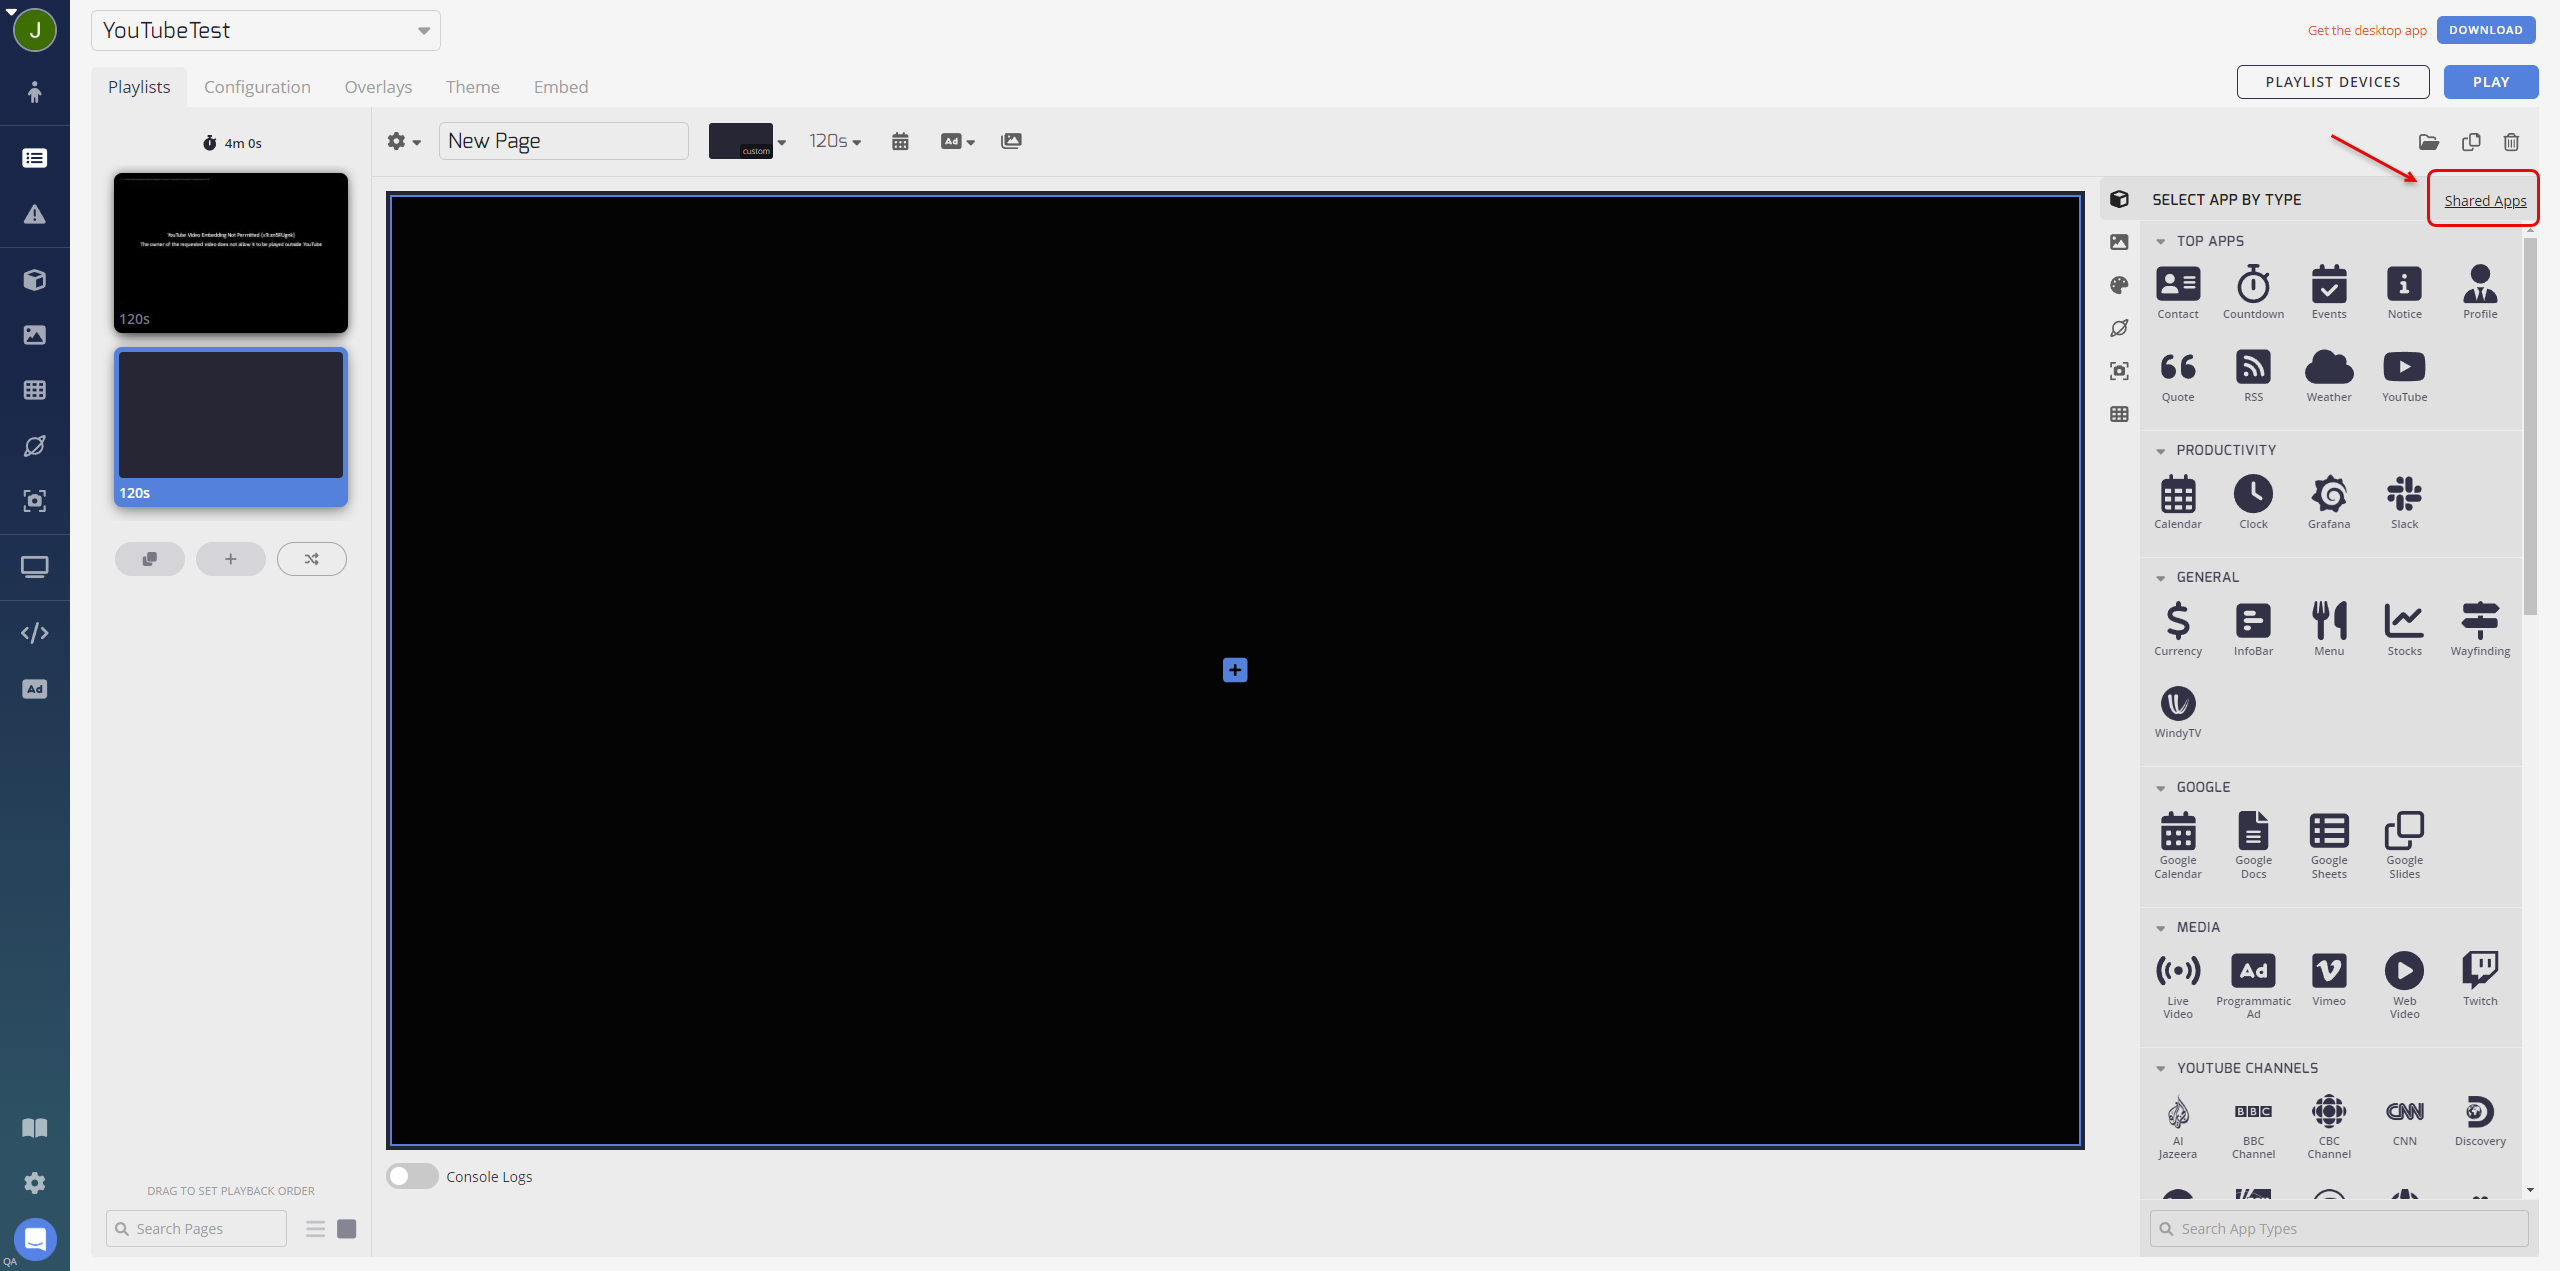
From the playlist editor, you can access Shared Content by clicking the button at the top right of Apps, Media, or Boards. This opens your shared folders and allows you to choose from your existing shared content.
Playlist Zones
Check out this article to learn all about our Playlist Zones feature. This extremely useful feature allows you to add multiple pieces of content to a single playlist page.
Now that you know the Playlist basics, check out the rest of our documentation on Playlists to become an expert! There's tons of customization options available to really make your digital signs stand out
Updated 3 months ago