
Video Compression
Resizing videos is a bit more involved than resizing images. You will need a tool to resize your video files. Here are a couple of simple options we recommend, but we also suggest conducting research to find the best tool for your needs:
- VideoSmaller (Web)
- Handbrake (MacOS / Windows)
Below, we'll provide instructions for each option.
VideoSmaller
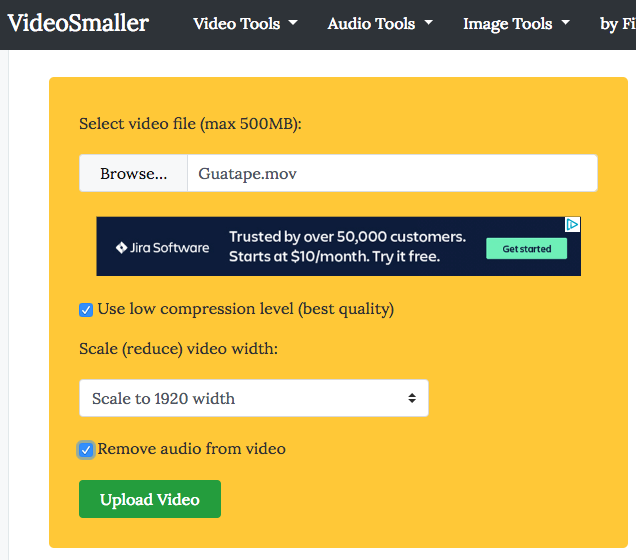
VideoSmaller is a free, online tool specifically designed to reduce the file size of videos. To use it:
- Upload your video file.
- Select the desired width you'd like to scale to. For example, if you're optimizing for a 1920 x 1080 pixel screen, choose 1920.
- To maintain quality, you can select use low compression level (you can experiment with and without this option to see its effect on your video).
- Optionally, you can remove the audio from your file if you won't be displaying it with sound.
- After you upload the video, you'll be provided with a link to download the optimized file.
Handbrake (MacOS / Windows)
Handbrake is a powerful open-source tool for video transcoding. It offers features such as changing video size, resolution, and audio encoding. To optimize your videos using Handbrake:
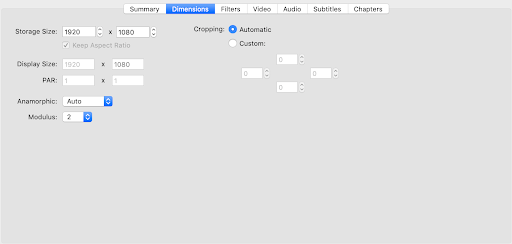
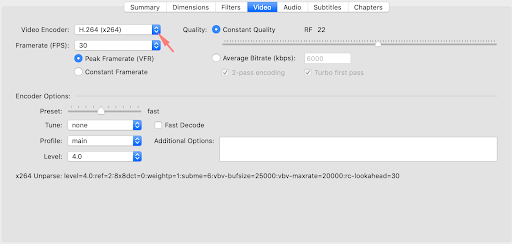
- Launch the Handbrake app and select your video file.
- In the various tabs and options available, focus on the Video,Dimensions, and Audio settings.
- In the Dimensions tab, select the resolution that best matches your screen (e.g., 1080p or 4K).
- In the Video tab, choose the h.264 codec, as this is what TelemetryTV uses and it will improve upload time.
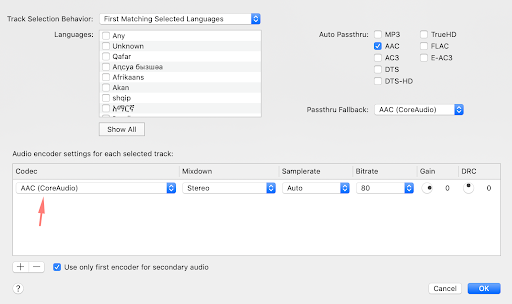
- In the Audio tab, you can delete audio support for a video by setting the recognized track to none in the tracks field.
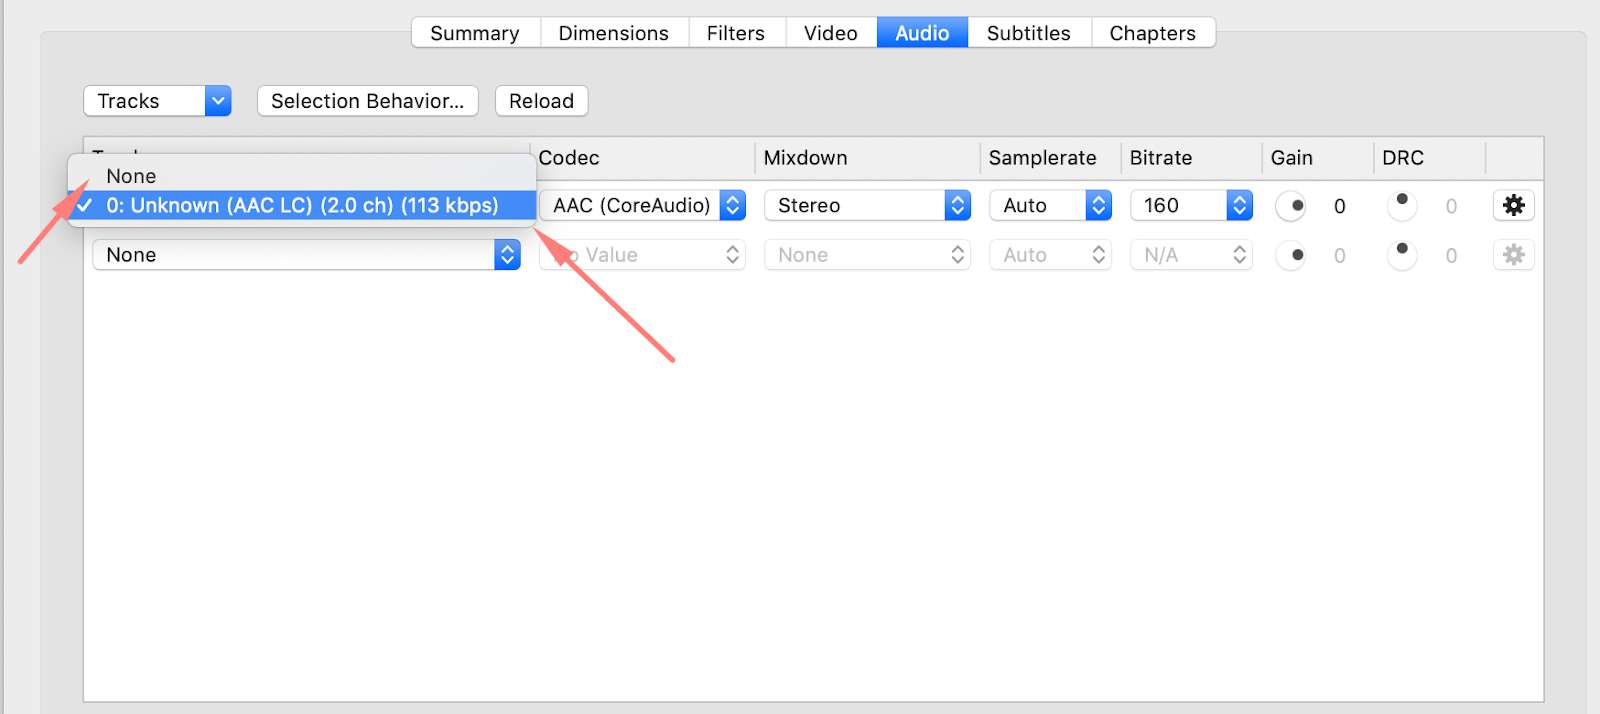
- Verify the audio settings in the selection:
Once you've completed these steps, click the start button to re-encode the video. The same configuration applies for other platforms, as Handbrake is cross platform tool.
Updated 8 months ago